Here are some shots from the birdfeeder in the backyard. I had my camera outside because an oriole was showing up to J's orange/jelly feeder and they usually don't stick around very long.
Some of the below shots show "frozen" motion of birds, and I picked the best ones that were in focus. Next time I may try to get closer to the feeder, although doing that scares the birds off.
I used the manual focus on my camera plus the burst mode, in which the camera takes 10 shots per second. Burst mode, plus a very fast shutter speed (1/2000 second) can help capture movement and sometimes get some fun shots. I sat in a chair on the patio, about 15 feet away from the feeder. My hope here was to use the camera settings to capture birds flying in to, or away from, the feeders.
For Christmas, J got me a set of three boat/ship models. They are designed to be progressively difficult, with the first being the "beginner" model. I'm 5 weeks into building it, and I'm still not done. It may be a beginner model, but I wouldn't classify it as easy.
Here's a picture of what mine looks like at the moment. It's about 3/4 done.
Fear of Heights
Why anyone would want to go to some deadly high place is beyond me. Take these stories, for example...
A Floating Retreat in the mountains. Nothing says vacation and relaxation like lying awake, shaking with the overwhelming anxiety that you're about to plunge to your death. I'm sure they double-check the ropes once a year to make sure they're secure, though.
Japanese Vending Machines
I had a coworker who once told me about a vending machine he ran into that made french fries. The Japanese are known for their fun and quirky vending machines. Here are a few YouTube videos about that topic. I like the one that has the mystery packages .
Guitar great Jeff Beck passed away recently, which sent me to Qobuz, the music service I subscribe to, to listen to some of his music. I used to own some records back in the day.
Play Chronophoto and guess what year a photo was taken. I guessed a few right, and was close on a few others, but I whiffed on a lot of them.
I like to play Name Drop on the New Yorker website. They give you clues about a person and you have to guess who it is. The trick to knowing the answers is to have read and memorized details from all the articles in the New Yorker about people from the last 10-15 years, because the facts usually come from those articles.
Keep Movin'
To close, I wish I could move like this, or even keep my balance as well as this guy.
In my last post, I linked to the work of other photographers who were using focus stacking to show the magnified details of various objects that aren't normally visible to the naked eye. One image that I liked was the penny with popcorn salt on it. (Original thread with photographer credit; image)
I did my own version of this and here's the result. I don't have the microscope objective that the other photographer used, so I can't get as close up, but I wanted to see how much magnification I could get out of my camera, lens, and lens accessories.
Equipment used: Camera: Olympus E-M1 Mark II
Lens: Olympus 60mm f/2.8 macro lens
Extension Tubes: Meike 10mm + 16mm (similar to these)
Magnifying Lens: Raynox DCR-150 attached to lens with step-down rings
Tripod: Crummy one but it worked
The extension tubes extend the lens, giving a magnification side-effect, and the Raynox is basically a magnifying glass at the end of the lens. With the high magnification, the depth of focus was even smaller than the previous example I showed.
Here's a shot from the middle of the stack.
Here's the final image from the stacking software - it's 97 shots stacked. Did you know salt was cubular? I didn't.
Before I took this series of photos, I tried a set with a penny with popcorn salt on it, like the original I'm trying to duplicate. That set of shots didn't turn out well because I bumped the table and moved the penny, but I learned that popcorn salt is actually shaped like tiny popped kernels! (Not really. It's cubes, too.)
I was recently talking to my sister about photography and I brought up the topic of focus stacking. It's hard to explain, so here's a demonstration.
Magnifying for Macro
The world of macro photography is fun - the more space on your camera's sensor you can take up with the image you want to capture, the more detail you can see on your subject. Normal zoom lenses can often do some macro-type work; some are designed to allow you to be close to your subject and still allow the lens to focus. Most typical zooms can't - you have to stand back from your subject in order for the camera to be able to focus.
With specially-designed macro lenses, you can get up close to your subject and magnify it such that details will show up in your images that you could never see with your naked eye.
Focus Stacking Example
Here's a picture of my macro photography setup:
Camera: Olympus E-M1 Mark II
Lens: Olympus 60mm f/2.8 macro lens
Tripod: Super cheap old tripod from Best Buy that came free with a camcorder, circa 2003.
Software: Olympus Capture.
Here is a shot of the subjects with normal camera settings - a bolt, Red Cross donor pin, and the ruler portion of steel calipers. The dark base they're on is an old tablet computer.
Olympus Capture
This software allows me to plug the camera into the computer and operate the camera through the software, instead of making changes on the camera itself. Here's a screen snapshot of the application running.
Most of the options shown on the right side would normally be changed on the camera itself, but they can be changed here. On the bottom right are some chevrons (<<<, <<, < and >, >>, >>>) which can be used to tell the camera to zoom in or out a little or a lot at a time. This is the equivalent of my rotating the focus ring on the lens by hand. I use these during the process of taking all the shots that will eventually be stacked.
Getting Started
I started off by focusing the lens on the closest point to the camera and taking a picture. Note how little of the image is in focus (where the arrows are pointing).
The problem with macro lenses, and microscope lenses (objectives) for those who use them, is that magnifying at this level means that not much of your shot will be in focus. It has to do with the physics of light and the way the lens and camera process it. The "depth" of the in-focus portion of the image is referred to as Depth of Field, or Depth of Focus. As you can see, with this lens and camera set up the way they are, there is a very shallow depth of field. Here's a good explanation, if you're interested.
Because it would be great to get a clear, highly-magnified view of this scene, I can't just set my lens at its highest magnification and take a picture, because the depth of focus is so shallow that I'll only get a little bit of the image in focus. This is where focus stacking comes in - stacking involves taking a picture, refocusing the lens to be slightly farther away from the camera, taking another picture, then repeating these steps until the lens is focusing on the very back of the scene, or the lens isn't capable of focusing any father away.
Each of these shots will include small slices that are in focus, and the rest will be out of focus. The "stacking" part is done by software, which can identify which parts of which image is in focus, and combine those in-focus parts with the other in-focus parts of the other images, and then combine them. (How does it do that? I have a vague idea but it's mostly magic.)
Moving the Focus Across the Subject
Let's continue to watch the focus change through the images as the focus is "moved away" from the camera and towards the back of the subjects.
This photo is about half-way through the focus's travels. The parts in focus are indicated. The parts of the first shot above that were in focus are now completely blurry.
The next photo is about 3/4 of the way through. Note that the focus is "moving" towards the back. Anything at a particular distance from the lens is in focus, even if the different objects in the picture are above or below each other.
Here is the final shot; only the very farthest reach of the subject is in focus.
Stacking the Images
Now that we have these shots, we can load them into Zerene Stacker or Adobe Photoshop to be stacked. The image below was created by Zerene Stacker, which is named for the one thing it does really well (and better than Photoshop): focus stacking.
The in-focus parts of each image were "found" by the software and included into the resulting image. You can see all the little imperfections of the steel in the bolt, the tiny marks on the face of the Red Cross pin, and the other flaws that are not visible without magnification.
Watching the Focus Move
I made a short video showing the progression of the focus - there are about 40 images total. This helps visualize the different steps.
Stacking Non-macro shots
It's possible to stack non-macro shots. It can be done with landscape photography, product photography for advertisements, and many other place - anywhere you can use a tripod to control the framing of the image you're taking. The idea is the same - the in-focus parts of the images you stack will be blended with the others.
More Examples of Macro and Stacked Images
Here are a few links to stacked and macro images on the Photomacrography website, where amateurs and professionals alike gather to show off their work, learn from others, and trade ideas. Some of these images were made with microscope objectives, which exhibit a tiny depth of field as a tradeoff for the high magnification they provide.
Dissolving sutures macro shots. This page not only discusses the appearance of real-life sutures, but makes a conjecture about how they are tied by a surgeon. Then a surgeon who is also a photographer weighs in, and the photographer eventually presents the images to the surgeon who performed the operation. Photography, knots, surgery - all in one place!
Popcorn salt on top of a penny, 330 shots in a stack. Neat! Click here for the discussion, and here for the picture.
Robber fly parts, a few different stacks are shown. I believe this was done with a microscope objective, attached to the camera with other lenses or adapters.
This is a small sample of what's on the forums, you can look around there to see other images of very small things, see people's setups, and so on.
Here are a few miscellaneous notes on the latest in electric vehicles and worthy destinations to which to drive said vehicles.
Vehicles
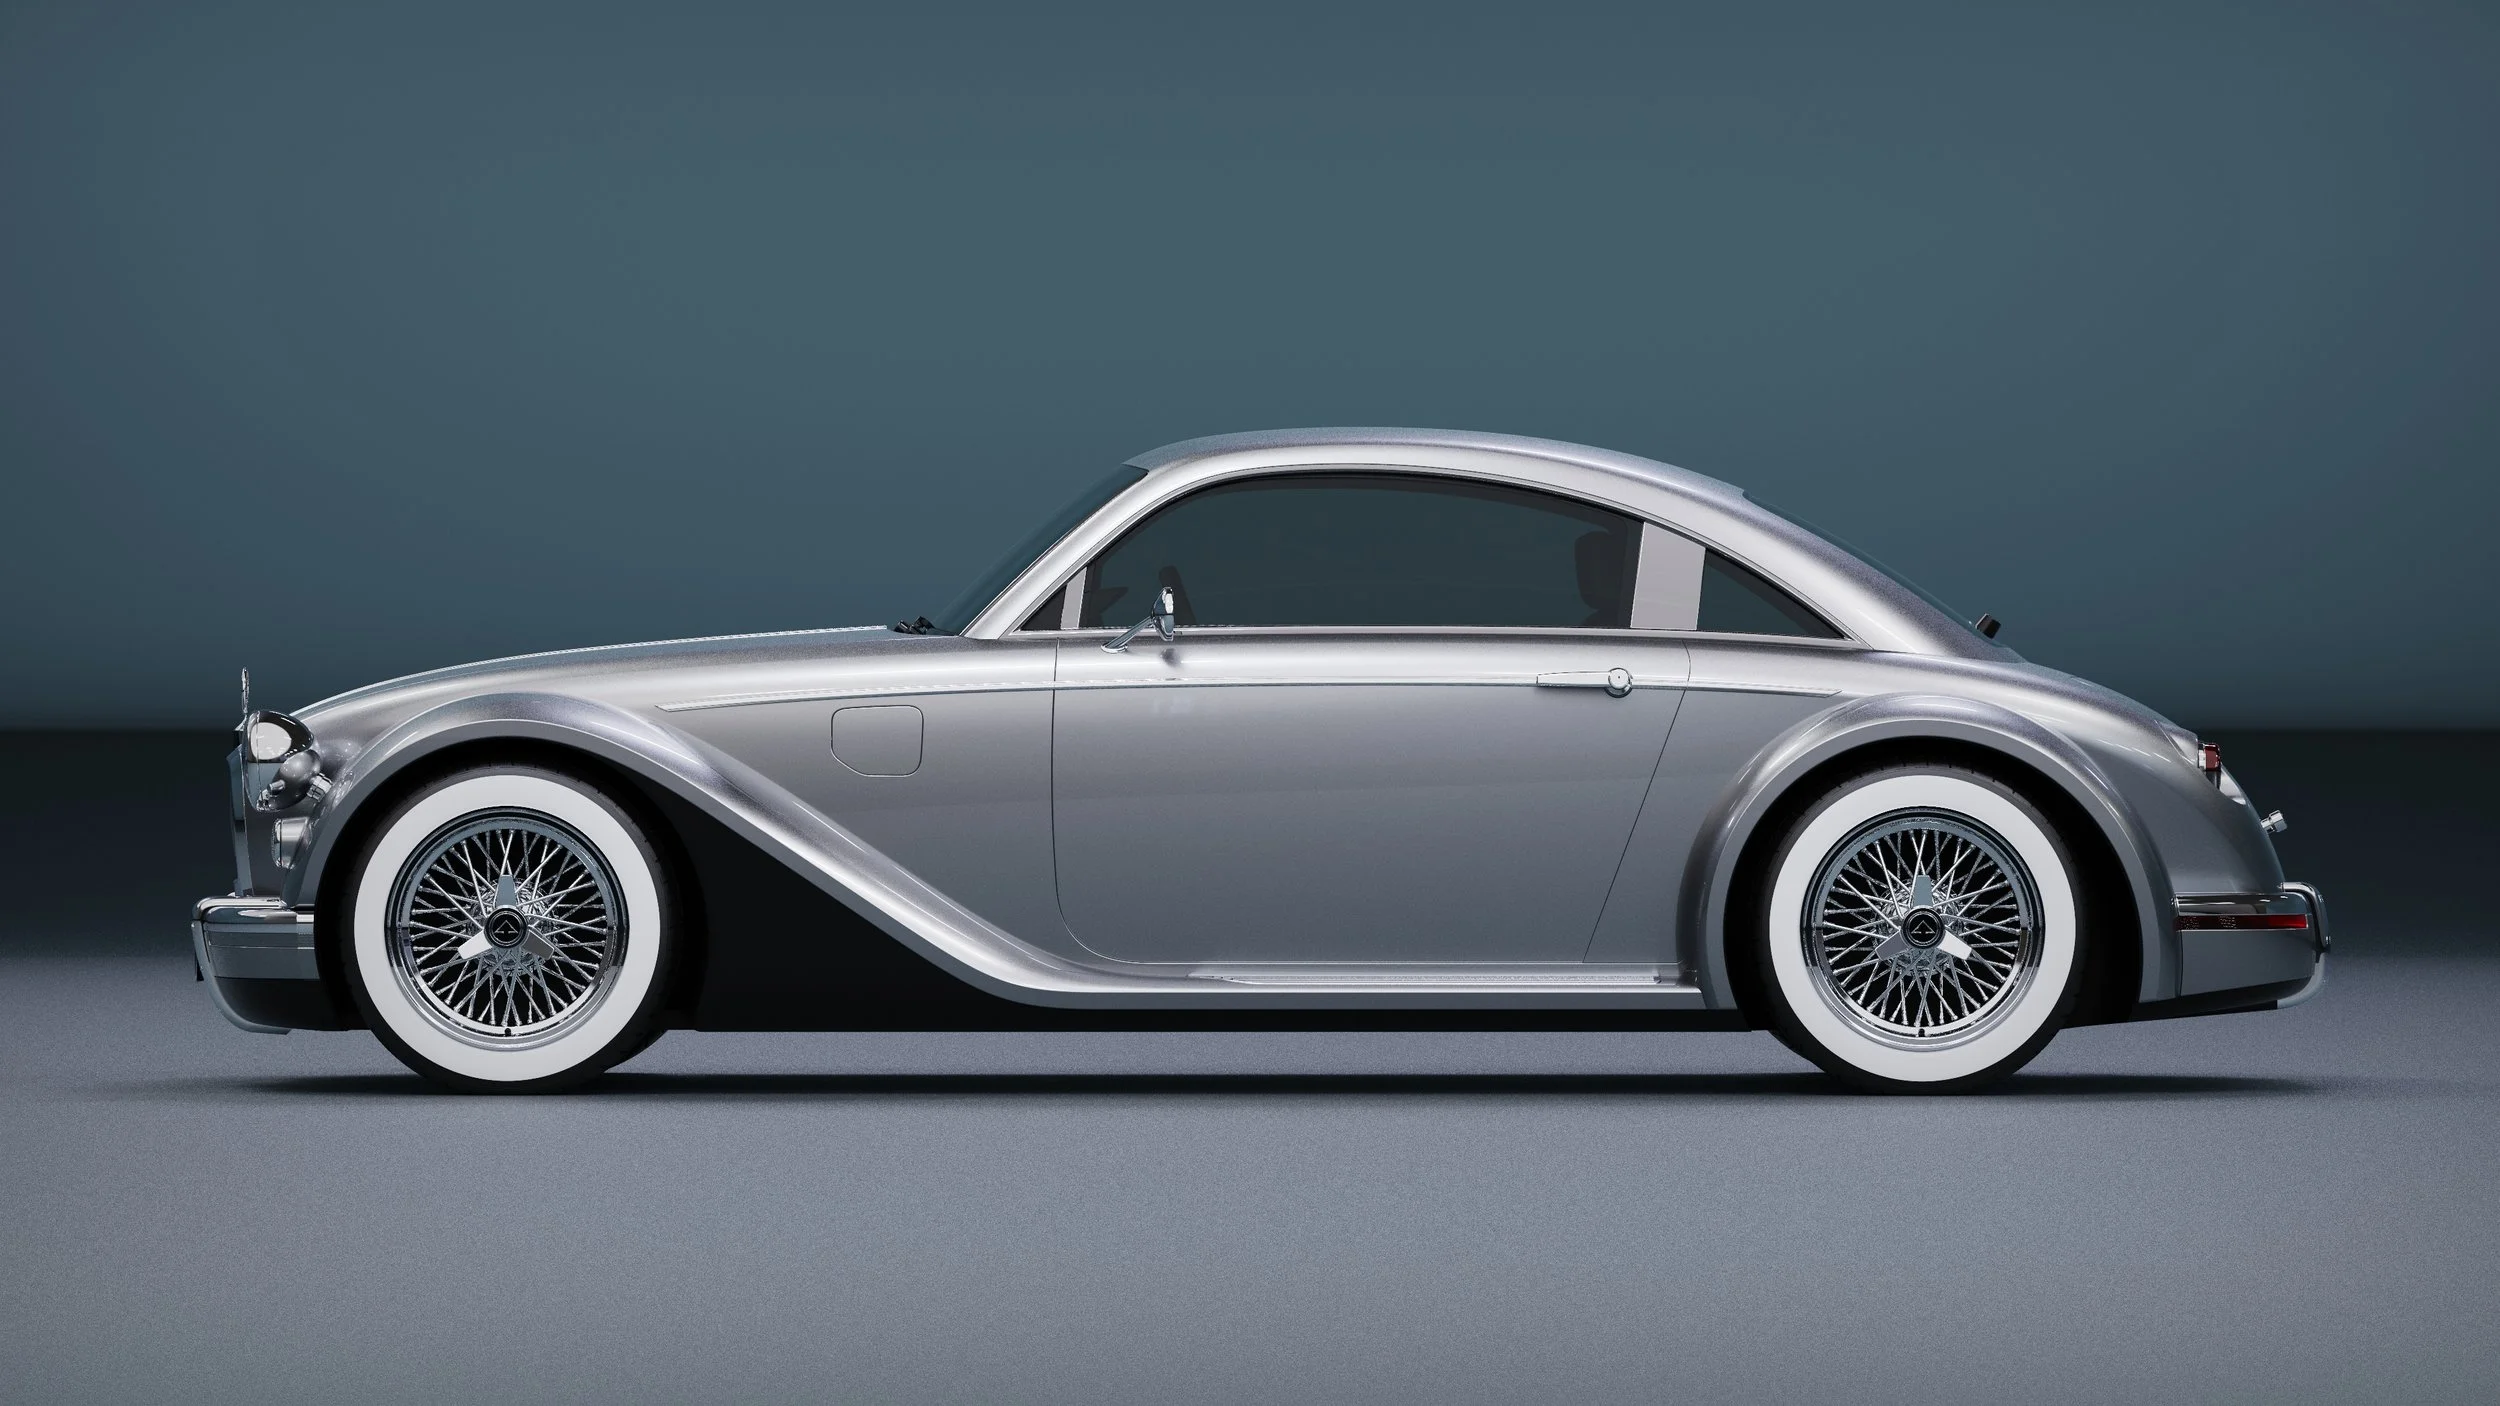
Alpha Motor Corporation
It just sits in your garage while you admire it. When it's sunny out, you can pull it into the driveway, and admire it. But do not drive it anywhere.
Meet the Alpha Montage! It's a neat-looking car, but the fine print indicates that it won't be a street-legal car, which is good, because it means you don't have to worry about someone scratching it in a parking garage. On the other hand, you can't drive it anywhere except your driveway. Maybe you can afford a ticket, given that this car will cost $500K.
Fortunately, the company has other options if you don't have a half mil burning a hole in your pocket and you like to, you know, drive your car places and do stuff. They will offer the more down-to-earth REX Utility Vehicle ($52,000) and the SAGA Sedan ($48,000). These two will turn plenty of heads and you'll still be able to retire at 65.
None of these cars appear to be for sale yet, but you can reserve one today, and cross your fingers that Elon Musk doesn't buy the company and run it into the ground before yours is delivered.
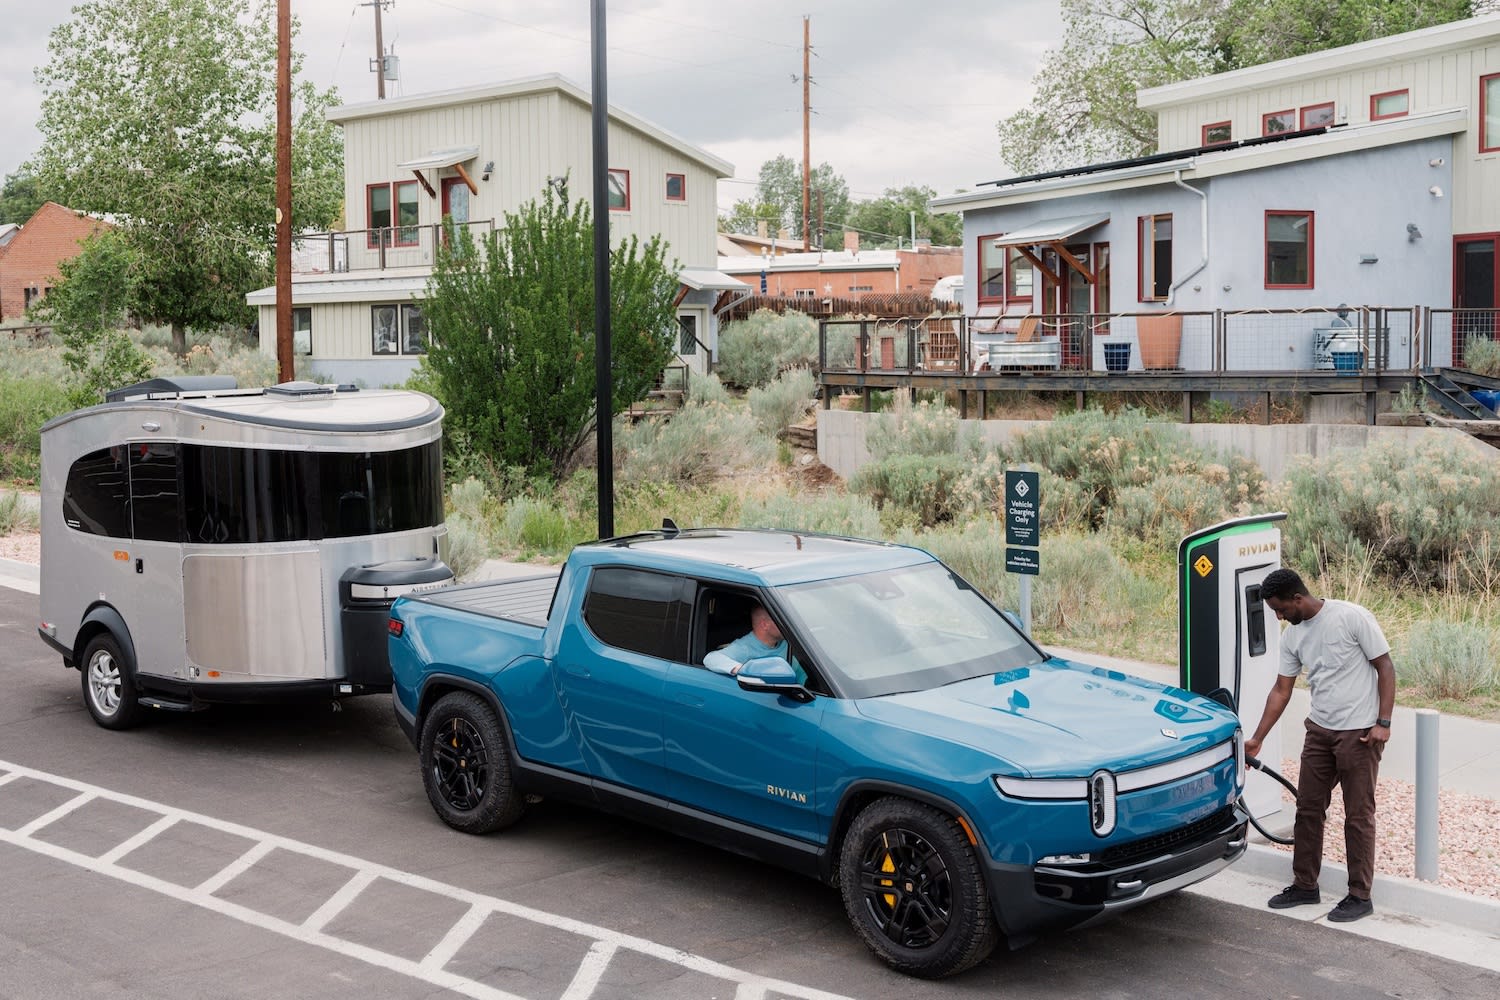
Rivian
Rivian has a development center in Plymouth, MI, as well as other places in the US. Amazon has made a deal with them to create a fleet of delivery vehicles. I saw one of them the other day, so it's becoming a reality.
The Rivian R1T, pulling a trailer full of gasoline and unrecyclable plastic.
Not gigging as an underpaid Amazon delivery driver? Consider one of Rivian's cool R1T pickups instead. At night, with the lights on, they look like spaceships.
GM
Driving a Cadillac Lyriq is like having a really expensive watch - the rest of your wardrobe better match, or you just look like a doofus.
I love the look of the new Cadillac Lyriq. Their commercials indicate that its drivers must be young and rich and super attractive. I may be super attractive, but I'm not young or rich, so I'm going to call GM and ask if it's OK for me to buy one. It's not cheap ($63,000 and up), but I could own one and still retire at 65.
Do you need a place to "go"? Swing by the two-story outhouse in Cedar Lake, MI, and pick your level!
I'd like to drive my Cadlillac Lyriq to the House of Automata, but unfortunately, it's in Scotland, so unless these new electric vehicles can float and paddle, I'm out of luck.
Some photos from Lillie Park South in Ann Arbor, and in my own backyard. Enjoy!
Pilings for a boardwalk/bridge that used to cross the water here. Some photos on this blog from last year show a green heron wandering along the boardwalk.
This photo is taken from the location where the other end of the bridge used to be, pointing back to the pilings in the previous photo.
I've seen better Goose V shapes...
I checked, and this does include hot dogs.
The morning reflections were nice on the big pond when I was there. I wish there were more fall colors here.
There is a bat house at the end of this path. I didn't check to see if there were any bats in it.
This tree in the park near the woods was the most colorful tree I found at the park, and I got a shot of it to show it my appreciation.
Backyard birches - the ever-peeling bark on these enhance the "falling leaves" look of autumn.
A birch in our backyard, and a few more colorful leaves from the neighbor's tree.


.jpg?format=750w)